MAKING
VALVE SHIELD BASES
copyright
R.E.E.Robinson VK2ILV
7 Roland Ave. Wahroonga 2076
Sydney, N.S.W. Australia
robinson@shlrc.mq.edu.au
Bases to hold valve shields can be easily made.
I was restoring an old receiver from 1940 and it had been modified
to a mixture of miniature valves and octal metal valves. Consequently, the
existing valve shields and their mounting bases had been removed.
I removed the miniature valves and replaced them with octal sockets.
My junk box had the correct vintage shields, but I had no valve shield bases
to hold the shields in place. I decided to make some bases. It is easy to
do.
There are several different types. All are made of thin sheet metal, some
of plated steel and some of aluminium. Most consist of a small hollow tube,
attached to the chassis. Other designs are just 2 clips, and some are a bayonet
fitting. The tubular type mostly have the top rolled over. All of them mount
on the chassis with 2 screws or rivets, using a flange. The flange is either
tapered from the base or completely cylindrical and uniform. The type on
one of my AR7 receivers were the squat tubular type, rolled top, cylindrical
flange, and plated steel.
I tried making some molds and squeezing thin sheet brass, steel, and even
lead into the correct shape, but met with no success. They either tore or
needed more tons of pressure than I could provide. I chose another method.
I selected some thin walled copper pipe, chosen so that the valve shield
would fit snugly over it. I cut it into small lengths. I then placed the
pipe into a mold and beat it evenly with a hammer, slowly flaring it out,
until one edge was at right angles to the tube, and about a quarter inch
in diameter larger than the tube. I then turned the item over, and started
beating the other end, but this time slowly folding it into the centre, until
it was also at right angles to the tube, but about a quarter of an inch in
diameter smaller than the tube. I cleaned up the rough edges by machining
it in a lathe, and getting a uniform bottom flange and top flange, ensuring
the hole was big enough so that a valve base would pass through it. I cleaned
it with sand paper. If the copper metal is too "hard" it will be difficult
to beat. It can be "anealed" (softened) by heating it with a gas torch, and
then slowly letting it cool.
The shiny copper base now needs plating. My attempts at tin plating were
not very successful, so I considered taking the bases to a plating shop for
zinc plating. As an alternative, I heated up a crucible with a gas torch
and filled it with molten solder. I then dipped the bases, adding flux when
necessary. A bright even coverage resulted, which will dull in time.

The photograph shows
two bases. The
left has had the bottom flange completed. The right base has the flange only
half flared out. The top roll in, has not been done yet. They both have white
scaly oxide innner, as they are old water pipes. At the extreme left is the
pipe joiner mold. Behind on the bench is a piece of torn metal, which was
one of the failures of the pressing attempts.
The mold consisted
of a piece of galvanised water pipe coupling, normally used to join two threaded
pieces of pipe together. I increased the inside diameter of this so that
the copper pipe slipped inside. I used a lathe to do it, but a file can be
used, if a bit slower. To adjust the depth of the mold, I screwed in a blind
plug, which is normally used to seal an open end. This mold survived the
beatings with the hammer, when clamped in a vice, and after 16 bases had
been made.
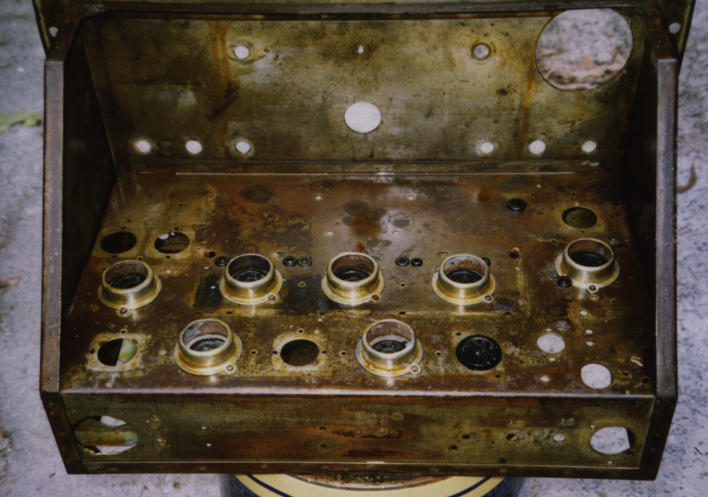
This photograph shows 7 of the valve shield bases fitted to an AR7 chassis.